Sunday, 11 September 2016

Painting Mars Attacks Martian With Daler Rowney Oil Paints

Painting a Mars Attacks Martian with Student grade Daler Rowney oil paints. I attempted to do a demonstration of this and it's the first time painting something out of my comfort zone and it turned out well, even though it remained unfinished at the end of the video, it still looked quite cool.

Check out the video directly on YouTube - Painting Mars Attacks Martian With Oil Paints


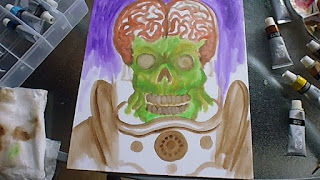
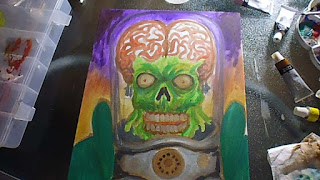
Here are the thumbnails that were saved for each video section I filmed on my Panasonic Lumix camera and it shows a nice progression to the near finished version right at the end of the video.

Starting off with the Martians head I used a watered down Burnt Sienna which serves as a nice base colour to sketch with. oil paintings and acrylic paintings I never sketch the drawing beforehand.

how to paint mars attacks

Painting in some yellow highlights as a guide for me later on, so I know what parts will have the highlights on the painting.


Green paint is added to the face taking care to try and work out where the shadows will fall on the face with a sort of mid tone green. Also lightening the eyes is needed too.


Trying to make more of the brains structure which I did struggle with because even drawing a brain is actually one of them difficult things to draw. But I was able to blag it and get some spaghetti looking shapes in there that resembled a brain with red oil paint.


Purple is added in the background and thinned out towards the middle of the painting and the eyes lightened further.

oil painting

Red acrylic in the middle and yellow mixed together help great a cool background colour that is cool on the top and warm on the rest, eyes and teeth are straightened with lighter colours too as well as a grey for the collar base for the helmet.


A Blue/Green for the armour and some darker green for the face to help more with the shadows.


The glass casing for the helmet was created with some of the grey paint I mixed for the rest of the helmet collar and also thicker purple paint was added at the top of the painting.

mars attacks oil painting

A pink colour was finally added to the brain in between the red vein strokes and also highlights on the blue/green armour and smaller details like the 2 red lights and the air vent on the collar. Additionally I added some white strokes of paint to the outer glass helmet to attempt some reflections.

mars attacks

A Positive Day = A Productive Day

The power of being positive cannot be underestimated. The power of being upbeat can do wonders for your productivity in any work that you do. I've found that the brighter I look on a given situation the better the outcome and the better I think and feel about the project at hand.

Negative thoughts always plague us of course, we are Human, but it's about stopping those thoughts in their tracks. Also the healthier we are the better we are able to think and do the stuff we love. I know myself that I haven't been eating healthy at all lately and I am doing something about it by taking some vitamin supplements to get me back on track and gradually I'll replace them supplements with good healthy food that is rich with nutrients.

Ways to feel positive

Being positive isn't easy for some people, they have to get rid of the negative things in their life to begin with. For me, being positive is about doing the things I love each day which is usually drawing, painting and creating artistic ideas and then at the end of the day spending time with my kids and Wife.

Sometimes it's the simple things in life that can make us more positive about the situations we find ourselves in. Certain TV shows have had an impact on my life as they draw you away from the mundane, you are able to see other fictional characters take on the drama for an hour at a time and then relax and let your worries and stresses disappear for a bit.

Ways to be productive

Being productive is first about being positive, without that you might not really do much or go far. I don't know how many times I've thought, I know I'll do some painting now in my Shed, only to remember it's a mess and needs tidying. We've all done it I can imagine. The negative thoughts creep in and torment you into not doing anything because of an obstacle.

Instead what you should do if the Shed needs tidying up or something is in your way and preventing you from doing the thing you want to do, in the first instance you should break down that barrier and tidy up the mess otherwise it's always become a block and other excuses may follow, such as it's too cold in there or there's no TV in the shed.


  1. Get rid of your distractions. Watching the TV can be great, but sometimes you'll find your watching any old shit on the box and then it becomes a thought like "why can't I find time to do more of the stuff I like?!" 
  2. Have a written plan of the stuff you absolutely need to get done in a day, prioritize the important to do stuff and try and get that done first over anything else.
  3. Do your emails, facebooking and all other internet distractions at the end of the day, make sure you don't even spend more than 30 minutes on this, if possible as usually it's a big waste of your time.
  4. Take regular breaks when you need to, often regular breaks help you split up a daunting work day and helps you focus on resting your eyes, stretching your legs in between work to help bring you back to it after your break. Breaks however are not for you to go off and watch an entire box set of x-files.
I myself recently have struggled with depression and this has dragged me down, but like any negative emotion it can be controlled with good thoughts and ones of hope and the dreams that you want to achieve in life. So no matter how hard you are finding life and the struggles you face on a daily basis, it always good to try and be positive. Look at yourself in the mirror and tell yourself you are going to succeed in whatever it is that you want to do.
Shia Labeouf said it best Just Do It!!!

Paint A Spider Micro Painting

Painting a micro paint on a 7cm by 7cm canvas of a spider, the idea with a micro sized painting is to challenge yourself and paint something smaller rather than bigger. I've done a couple of these small acrylic painting challenges on my youtube channel. I posted here about a 31 Evil Clown Micro Painting

I used very cheap acrylic paints for this painting and they were purchased from www.theworks.co.uk which is a uk book shop that has some great budget art supplies that I always tap into.

micro painting canvas

A glaze of brown acrylic paint watered down is covered over the small canvas.


A thicker less watered down acrylic paint is used to shape the spiders body and legs, I like to keep it very loose at this stage.


A darker brown acrylic paint helps define the body of the spider and makes it more real.

paint the spider

A Crimson red glaze over the canvas which seems a bit heavy handed and probably was, but it helped create another acrylic layer over the top.


Thick black acrylic paint is added to really bring the spider creatures shape back and also correct parts of the legs I wasn't very happy with at all.

black spider painting

A nice thin glaze of yellow acrylic over the lot. And painting the eyes with a viridian green and a thick crimson red for the body of the spider. I was also thinking about some kind of texture on the body that's why there are orange watered spots on the torso.


Adding white spider webs in the background and lighter green highlights on the eyes to make them stand out more, also tried adding veins and other details on the spiders body.

acrylicpainting

Smaller yellow details behind the webbing and a little bit of under shadow on the legs and it's done.

micro painting spider

Friday, 12 August 2016

Preparing For Hull Horror Fest October 2016

I'll be attending Hull Horror Fest in October and to prepare for this I am drawing some new horror artwork that will be available as art prints for the event. This will be my first time attending any such event and it'll be a mix of nervousness and cool all rolled into one as there will be other Artists there and so this blog post will document everything including the preparation for the Festival, right through to being at the Horror Fest.

Prep work

8th August 2016 - Work begins on 3 - 5 new artworks as shown in this video - Horror Art Prints For Hull Horror Fest and there are a Phantasm tall man illustration and a Demons drawing as well as a Ghoulies one that are looking good, the Omen one needs more work and I'll more than likely re-draw that one.

10th August 2016 - Sorting through older artworks that I didn't finish and there are loads of pieces I would like to complete, such as a basketcase one and a The Thing illustration which are A3 size illustrations I begun back in 2014 which remained unfinished.

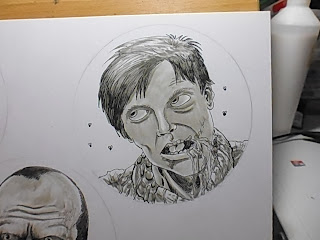
This sketch is a random zombie design that I want to make stickers out of, will see what happens with this one

hull horror fest preparations

18th/19th August 2016 - Been working on some classic horror sticker ideas and from top to bottom there are Flyboy from Dawn of the Dead, Bub from Day of the Dead and the crushed jaw Colombian neck tie zombie also from Day of the Dead.

dawn of the dead flyboy

day of the dead bub zombie

Colombian Neck tie Zombie

Also I am grey coloring some undertones on this Demons piece too before coloring. I just need to ink the top of the head as well as sketch the proper Demons logo, so that customers know that this will be a Demons horror movie homage artwork.


I've used some copic warm greys to grey tone them before coloring and I like the way they are turning out, so much so that I am investing in more copic marker refills as they last longer than the standard pen markers.

27th August 2016 - I've since finished those horror stickers but have more planned. Here are the finished stickers available from Zazzle and I'll be printing out some myself to sell at Hull Horror Fest.


1st September 2016 - Working on some new horror sticker ideas and am pleased with some of the results. Chucky, Ghoulies and a Critters one...oh and a Killer Klown A4 sized piece of artwork that will be an art print.

childs play chucky art

critters horror artwork

ghoulies horror artwork
 The Killer Klowns From Outer Space was a spectacularly fun horror film, although looking back the movie wasn't as frightening as I remember. Almost comedic in it's approach, but still a favourite movie of mine and so with that in mind I wanted to do another Killer Klown illustration that hopefully will look a bit more professional than I used to draw.

I'm using Copic Markers and Faber Castell Polychromos Pencils to add the colours, first grey toning and getting the tones right before adding proper colour to the piece.

killer klown artwork wip

4th September 2016 - I've decided to plunder some older artwork that would also be a good fit for Horror Fest including a Zombie Superman drawing that looks awesome, but really needed color adding to it. So I used some copic Ciao Markers with some much needed copic refills and some polychromos pencils for the brighter colours.


zombie superman art

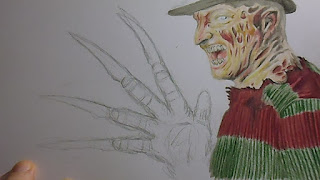
Also I've been working recently on a Nightmare on Elm Street Freddy Krueger illustration piece too, which was referenced from a photo, but I tried to go my own way with it and it'll have a unique background full of boiler room pipes.

freddy krueger artwork


I'll update this post frequently with new updates photos of artwork and other stuff as I continuously prepare for the horror fest.


Tuesday, 9 August 2016

Micro Painting 31 Evil Clown Painting

Acrylic painting an evil clown painting on a micro canvas, the clown is inspired by the new Rob Zombie movie 31 and it was a small art challenge to paint that small on a 7cm by 7cm canvas.

Here's the video showing me painting this. Enjoy!


If there are any other things you would like me to paint or even cover in a tutorial then please let me know.

Friday, 15 July 2016

Drawing Some Horror Stickers Concepts

I'm drawing some horror sticker concepts and quick ideas in a couple of drawing videos here. The idea is to use them as either promotional giveaways with other art prints or use them as incentives for people backing a future kickstarter that I am planning on launching sometime.

This first one is a drawing of a bright and colorful looking fish design with a skull squid in it's mouth.


The next two drawing I used a circle template to contain the designs within a circle and a demon and a skull looked like the best idea to try and draw. These need coloring, but they are ready for me to do that in the future.


If you would like to see me draw more horror stickers or sketch cards, then please do comment below and tell me what I could draw, I am open to commissions also, but I really only draw horror stuff at the moment as it holds my interest more.

Sunday, 5 June 2016

Drawing A Bloody Horror Skull

Drawing a bloody horror skull. In the daily art vlog I draw a bloody looking horror skull with wooden stakes shoved right through the eye sockets. This was based off a concept I drew earlier in a video series called Warm Up Wednesdays in which I sketch quick concepts for later development.

I used some grey tone promarkers, prismacolor pencils to color this skull. Enjoy watching the video!


Friday, 3 June 2016

Drawing Black And White Horror Sketch Cards

Drawing black and white horror sketch cards. Sketch cards are small trading card size pieces of artwork that can be sold or included as a bonus for buying a larger art print or illustration of any kind. The reasons for creating these is to help try and push me to draw more, but also have more artwork for sale and of course to include bonus artwork with some of my other work.

horror sketch cards


In the following video from my daily art vlog series I draw  a handful of them as a starter with a view to draw more later. I want to have a mix of color and standard black and white cards on offer.

Drawing Horror Sketch Cards

I used a Pigma brush pen and other fine line ink pens for these small illustrations. I buy my art materials and equipment from eBay.com or Amazon.com mainly.


Drawing A Demon Girl With Wings

Drawing a Demon Girl with wings. This was another daily art vlog in which I am attempting to draw something new each day to keep me in the habit of drawing something, anything, Cheer me on if you want to!

I enjoyed drawing this one, because I did something similar a few years ago here - Demon Woman With Wings

With this design I was thinking about a costume for her and to draw this completely from scratch, because the other one I had some help with a reference picture.
I used some promarkers and prismacolor pencils which I always buy from amazon.com or ebay.com as you can always find them cheaper than actual art shops such as hobbycraft.co.uk

Please let me know if you have a suggestion for me to draw, all suggestions are welcome and will be noted.


Let's Draw An Evil Purple Worm

Drawing an evil purple worm. My daily art vlogs are changing for the better with this one in which I focus on one illustration for the most part of each day and stick with it until I'm happy with it.

Drawing a purple worm, this was inspired by those sand worms in Dune and an Octopus character in the Savage Dragon comic who had huge purple tentacles. This was fun to draw and was a request from another YouTuber.

Drawing a Evil Purple Worm

I used prismacolor pencils and some winsor and newton promarkers to color this. As far as a professional illustration goes, this needs some more artistic tweaks here and there for it to be considered as an art print, maybe add some kind of background or get rid of the background altogether.


Monday, 2 May 2016

Horror Art For Sale On Bigcartel

I have some horror art prints for sale on bigcartel if you are interested in owning an art print or two from me. horror art prints I have 5 limited print runs of recent horror illustrations and once they are gone they are gone. Personally the black and white horror splatter illustration is my favorite followed by the colored pencil Critter, but you might think different about the prints on offer.

If you don't fancy buying any of the art prints, then please could you share my art store with someone who might be interested. Cheers!

Drawing William Birkins Mutation From Resident Evil

Drawing the William Birkins mutation from the Resident Evil game. I liked drawing this creature design and even though at the end of the video it looks finished I still want to do more to the illustration.

In the creation of this design I used a combination of uni-pin fine liner ink pens, a pentel pocket brush pen and copic markers and letraset promarkers for the coloring. These art materials I bought on Ebay.co.uk as they were far cheaper than any other art store, such as Hobbycraft.


Friday, 1 April 2016

How To Draw An Undead Skeleton Rising From The Grave (Drawing Video)

How to draw an undead skeleton rising from the grave.this is one possible idea of drawing this idea, although I wanted it to be more immersive in that the undead skeleton had to be more embedded in the ground with lots of mud, earth and worms dropping off the undead creature. But I guess the beauty of drawing stuff like this is that I can re-draw it again in the future.

Don't forget to click subscribe within the video if you want to see more of this type of horror artwork from me, and I hope this drawing video gave you some inspiration to draw your own undead skeleton.

Thursday, 28 January 2016

Drawing The Mummy Lives Horror Commission

I recently did a horror commission of a classic rendition of The Mummy, now with my drawings I always try to do some off centre ideas that don't show all of the full character, but enough to show a detailed and fun commission, thankfully the Client liked this idea and so I ran with it.

The idea of drawing the mummy had to include a bandaged horror creature drawing and adding just the top head, shoulders and one arm raised helped to make it look like it was waking up from an ancient slumber. Plus the cobwebs were a nice addition to the drawing.

draw a mummy
Light pencil sketch of the mummy on A4 paper
A sharpie marker was used for the main outlines, this doesn't have to be exact because we will be blacking out the background and I can draw the cobwebs in and any other stuff such as correcting the outlines in white.

mummy drawing
Black sharpie marker is a great pen for the basic outlines of the mummy creature.
I like to try and black out the background and try and make it as streak free as possible, but this wasn't necessary as I will do that through Photoshop to clean the image up for the client. I used a large Chisel tip Sharpie marker for the large dark areas and remembering not to go over that small hanging bandage on the arm.

mummydrawing
Bold blacks in the background help the creature come forward more.
 More details were added with fine line ink pens to simulate rotting flesh and to attempt to make the bandages look rotten too. Further white ink lines were added with that classic Sakura gelly roll pen on the cobwebs and extra juicy drips dripping from the undead corpse of the Mummy

draw mummy commission
Notice some of the cobwebs breaking at the top to show that there is some movement.

I did do an alternative version of this mummy drawing, way back in Halloween 2015 and I just recycled the composition of that basic ink drawing. And here is that ink sketch. Often the most annoying thing about quick sketches sometimes is, they look better than the commission I'm trying to draw, so I will develop this quick ink drawing into an art print at some point

mummy ink sketch
Rough draft of an idea I had before I got the mummy commission
See also my other mummy drawing post in which I show you how to draw a mummy through drawing videos here - How To Draw A Mummy

Drawing A Spawn Art Print Illustration With Promarkers and Copics


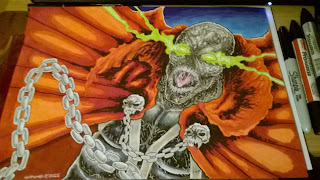
Drawing an Al Simmons Spawn art print with Letraset Promarkers and Caio Copic markers. Spawn is a favorite comic book of mine that I have collected and read the comics ever since they came out in 1992. Originally drawn, written and created by Todd McFarlane as one of the head lining comics at Image Comics.

So with this idea, I wanted the focus to be on the Al Simmons Spawn character and a close up head shot of the horror character. The costume is always the main feature, so I wanted a portion of the cape and chains to be appear in the illustration.

I used a copic multi-liner for the fine detail on the head and a thicker copic pen for the outline and shadowed areas on the face. If you look closely on the second image below, you'll see that I used the infamous White gelly roll ink pen to add some nice highlighted flesh on the darker areas of Al Simmons face.


draw spawn art print
The head was the only thing I spent time on getting right, the rest sort of fell into place.

spawn art drawing
Inking the face of spawn and the chains and other elements.

spawn illustration drawing
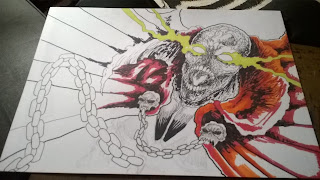
Coloring the cape section now with red and orange promarkers and the green glow around the eyes.

spawndrawing
The cape first layer of red and orange is done, needs more red later.


drawing spawn
The face some copic greys and a dark blue and china blue promarker for the night sky in the background.


drawspawnart
Spawn art print illustration complete, all went well, perhaps some more coloring on the cape, which could go on forever.
I will be doing more spawn art print illustrations, mainly because as a fan of the comic I like drawing the character.

Drawing An Exploding Skull Illustration In Black And White Ink

When drawing a good idea like an exploding skull with just black and white ink pens, the key thing to remember is the structure of the skull first and to what extent you want the skull to be destroyed, it's that simple.

Here follows some progression shots of drawing this concept on A3 size paper. The first rough sketch in pencil I pretty much nailed that moment, just as it's started to explode with the eyeballs popping out of the skull like Olives.

If you are trying to draw this kind of horror art, I would recommend you do some rough sketches beforehand to get the idea right in your head and the placement of the design. For me, I knew early on that the skull had to be directly in the centre of the paper with everything flowing from that source image.

drawing exploding skull
Sketching the rough idea for an exploding skull.
I used a mix of Pigma Microns and uni-pin fine line ink pens to ink the basic outline of the skull design. The inking stage is always the best time to clear up anything which you don't like about the drawing.

illustrating exploding skull
I inked the outline of the whole skull design with fine line pens
I used a thick bullet tip Sharpie marker for the black space in between all the white splatters which will represent the blood. I call these types of thick markers disposable, because they don't last long usually when filling in large areas of black in an illustration.

skull design illustrations

drawing horror skull designs
Filling in big spaces on the paper can take longer so stick with it. 
 Once all the black areas were filled in, I used a White Sakura Gelly Roll ink pen to add more white splatters simulating the blood. I quite possibly won't be coloring this illustration in any time soon as I like the contrasting black and white of this piece.


drawing an exploding skull design
The full drawing finished of an exploding skull

Wednesday, 27 January 2016

Sketch Notes For Fiverr Commissions

Sketching is the best way of seeing if a drawing or illustration works and quite obviously it is my preferred route to create an illustration that my customers will be happy with. This post shall link to different posts on individual fiverr commissions I work on frequently on my Fiverr account Waynezart horror illustration.

But the first one here is a Japanese Demon illustration I got commissioned to create and I enjoyed drawing this one.

I remember being given some great japanese demon art reference files that really helped me draw this design from the Client. There is just something other worldly and cultural about these Demons that reside in the Japanese mythology.

Basic pencil design I thought early on that this first sketch was the one for the Client
japanese demon drawing
I inked the outline and tried to focus on just the outlines with some minimum large black areas
fiverr sketch notes
Here you can see the full design.
Inking with a Sharpie and a uni-pin fine line ink pen


Starting to add some color with copic and promarkers

The above design I was lucky, because some customers really demand that I revise the designs at least 2 or 3 times which can limit my creativity somewhat, but they are commissions, so what can you do!?

Look for more Fiverr commission sketch notes as I go along.