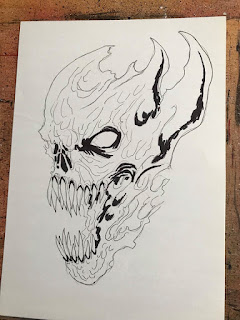
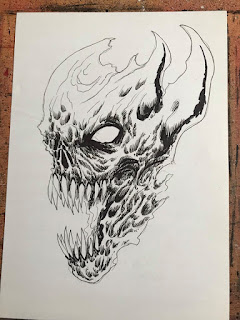
Inking Demons Head step by step with ink process. I used a regular black Sharpie marker for the darker areas to build off on with other ink pens such as 0.7 Uni Pin fine liner and a 0.1 and a 1.0 for any medium sized ink lines.
1. Start off with a loose pencil sketch of your idea, the looser the sketch the better to add detail later on. I used a 6B Staedtler pencil for the quick sketch
2. Ink in the outlines with a thin ink pen, I used the 0.7 uni pin ink pen for this.
3. Add extra line details that will form the basis of skin and flesh texture later on.
4. Use a sharpie marker to add in some shadow areas.
5. This video explains the beginning of the textured ink process.
6. Use ink hatching to add the detailed textures.
7. Complete using the 0.7 and 1.0 ink pens creating varying ink lines.
8. Use the 0.1 uni pen ink pen to create finer ink lines at the tops of more heavily inked areas for smaller details.
9. Take a look at your drawing and see what else you could add to it. Any finer details or other tiny textures will add something to your demon head.
10. I decided to add a thicker underline underneath to create a line weight that helps give the head drawing an extra layer of depth by making it more solid and shadowed.
And there you go, I tried to make it as less wordy and complicated as possible, so you could follow along or try and gain some inspiration from this post,if you would like to see more advanced inking techniques, then I shall be doing a post which will focus more on that and then you could take your inking to the next level.
See this other example of a different Demon Head being drawn and inked for further inspiration.


No comments:
Post a Comment
Fantasy Art Inspiring Resources
It is recommended that you don't spam this blog as your comments won't be published.
I welcome any opinions and feedback about this blog aswell as your chance to shine too as you can find lots of inspiration through this fantasy art blog, so ask questions when you have them and I'll do my best to answer them for you..