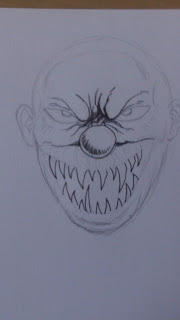
Drawing a Demonic Clown face step by step with this set of drawings as I went along. This post is an attempt to accompany my other blog post with the video on
drawing a Demonic Clown face and this should be seen as an extra alternative drawing tutorial which I hope you also find quite useful.
Step 1 - Draw an oval shape for the head. This is the typical first step in which you can build any face drawing.
Step 2 - Begin to sketch the eyes and the Clowns red nose. Once you have these roughly sketched in lightly you can start to loosely draw other parts of the face.
Step 3 - The mouth makes or breaks your demonic Clowns face, so the more teeth the better. An evil grin or a menacing grin.
Step 4 - Sketch some more loose details around the mouth.
Step 5 - Darken the pencil lines around the eyes and the nose.
Step 6 - Darken the pencil line around the jaw and begin to sketch in the ears (See this on drawing ears)
Step 7 - Inking begins with a nice fine line ink pen. Don't worry about trying the latest greatest and most expensive ink pens, cheap ones work well.
Step 8 - Start inking those evil looking teeth.
Step 9 - A few more carefully inked details, take your time inking your demon clown face.
Step 10 -Start to ink around the face edges, jaw line and ears.
Step 11 - Ink some of the previously pencil sketched details and don't be afraid to add or improve on your original pencil sketch design.
Step 12 - Ink the mouth with cross hatching in which lines of ink are layered over the other to look rather sketchy and arty.


